Screen tear or input lag? To vsync or not to vsync? For the longest time, this was an either-or question in the PC gaming space. You could either have a tear-free, properly frame-paced image or low input latency. You couldn't have both. Or could you?
Well that depends. If you already have a modern gaming monitor that supports variable refresh rate (FreeSync or G-Sync), you don't need to use this guide at all. But if you have a regular, fixed refresh rate monitor, or if you like to play games on your TV, this guide will help you get a tangibly better experience in terms of screen tearing and input lag.
By leveraging millisecond-accurate frame-capping in RTSS (Rivatuner Statistics Server), you can enable low-lag vsync on. The result? Clear, tear-free image quality and input latency that's up to 50 ms lower than conventional vsync.
This is one of those rare PC tweaks that can massively improve your gaming experience with minimal tradeoffs and no investment. What the heck is it? And how do you do it? We'll walk you through, step by step, in this guide.

What is input latency?
Before getting into the how-to, it's a good idea to understand exactly what we're doing. Low-lag vsync on is a technique that helps to reduce your input latency. What does that actually mean? When you type on your keyboard or move your mouse, there's a slight, almost imperceptible lag between the action you take and the output on your display. This lag is so minor that it's measured in milliseconds. When you're using your computer to browse or playing casual games, it doesn't tangibly affect the experience.
Also read: How Many FPS Do You Need? Frames Per Second, Explained
However, in competitive situations like esports shooters, every millisecond counts. A few ms of input lag could mean the difference between getting that headshot or getting scoped yourself.
All monitors (and TVs) add a certain amount of input lag by default. This is typically dependent on the type of panel being used. High-refresh rate IPS and TN panels deliver the lowest input latency out of the box. Some monitors go as low as 0.5 ms. VA panels tend to have more input lag, with many panels in the 8-10 ms. TVs (which often use VA panels) tend to be the worst performers, with some that go as high as 30 ms or more.
When vsync is turned off, your GPU sends rendered frames to the display as fast as it can. Because the display can only output frames so fast (1 frame every 16.66 ms for 60 Hz panels), screen tearing happens when a new frame arrives before the previous frame's out of the picture.
When conventional vsync is enabled, the GPU is no longer able to replace the contents of the monitor buffer with a new frame, before the old frame gets its 16.66 ms of fame. This means every frame gets to be displayed in its entirety, eliminating screen tearing. However, this forces the GPU to queue up frames, instead of sending them as fast as possible.
Because of queuing, conventional vsync can add as much as 50ms of latency on top of your display's baseline input lag. This is where low-lag vsync comes into the picture.
With the low-lag vsync technique, you're essentially capping the framerate (how fast the GPU outputs frames) to a number that's every so slightly below the monitor's refresh rate. This prevents the GPU from sending new frames in before the monitor's ready to output them. The result? A screen-tear free experience with latency that's almost as good as vsync off. Here's how you can do that...
What you'll need
Before getting started, you will need to download the latest version of Rivatuner Statistics Server (RTSS). You will also need an active internet connection, so that you can access these two web pages for running tests:
The HPET (High Precision Event Timer) should be enabled in your BIOS. If you've disabled it for some reason, please go back in and enable it.
Getting started
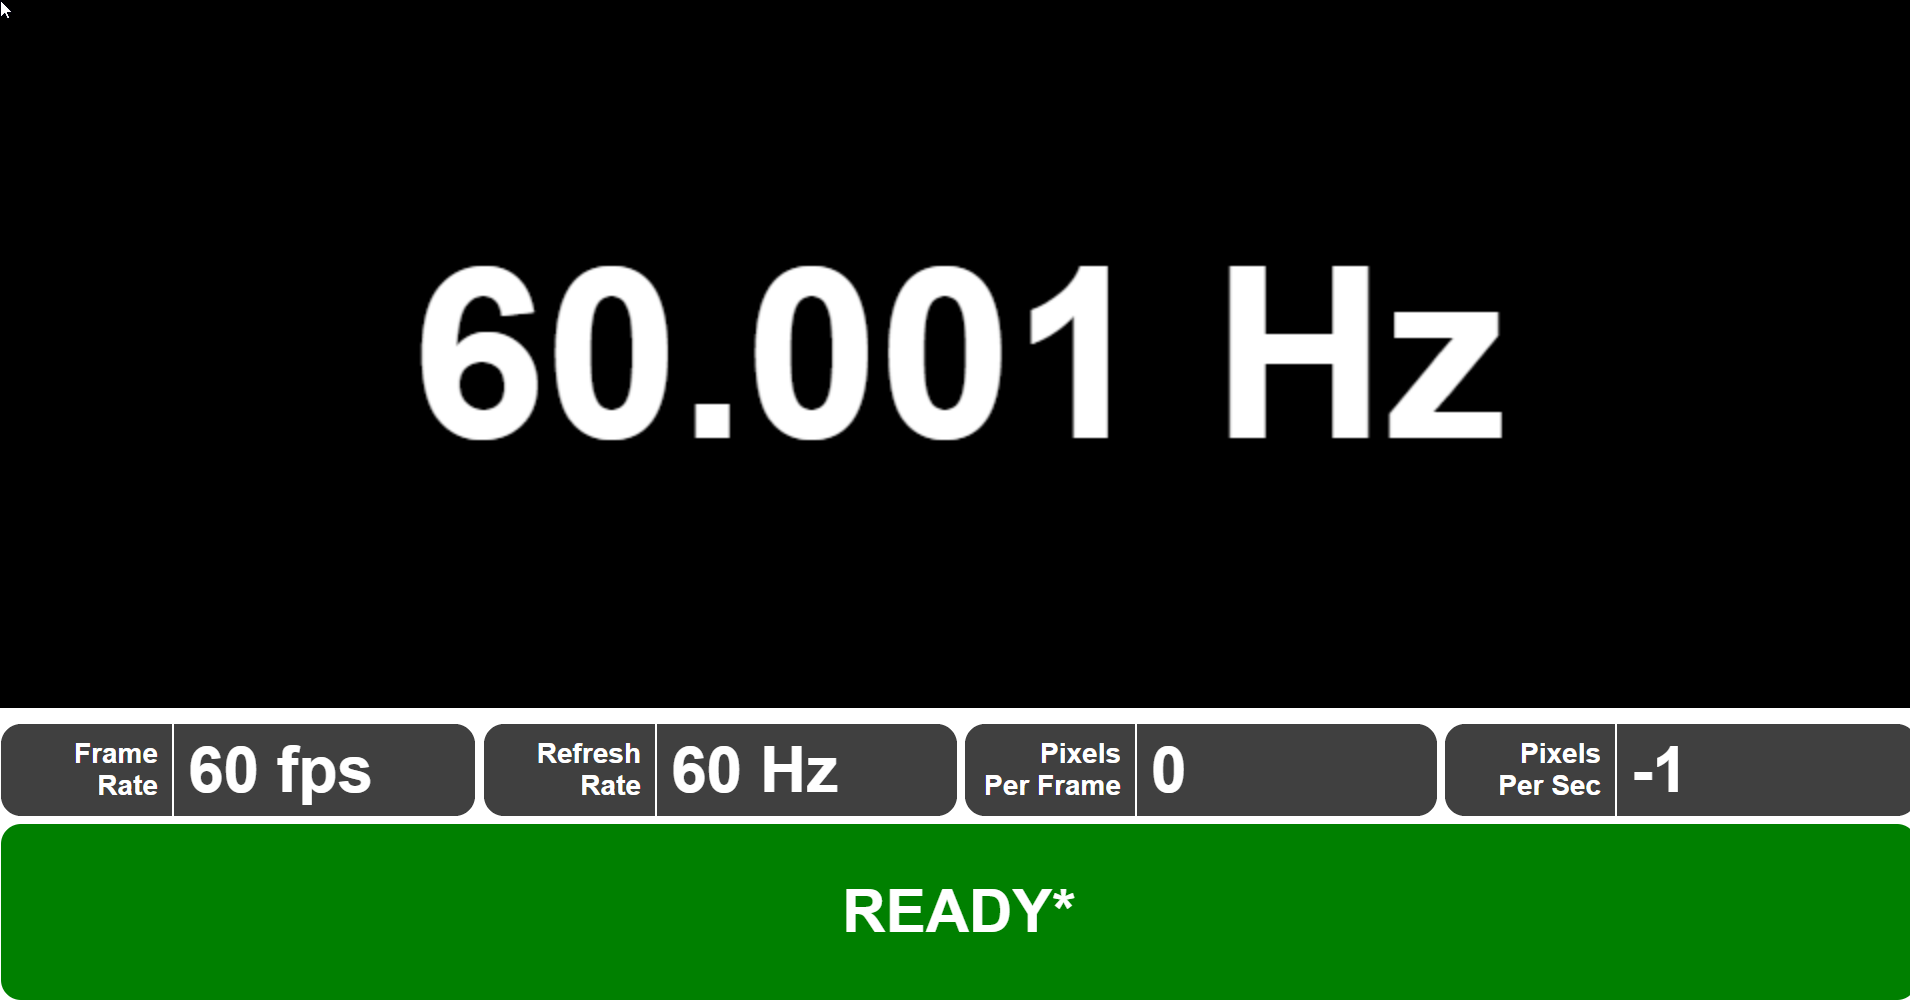
The first thing you want to do is determine your monitor's actual refresh rate. If you have a 60 Hz panel, it will likely be very close to 60, but off by a few hundredths of a second. Use either the UFO Refresh Rate Test or vsync Tester. If you have extra time on hand, use both to see if the numbers align.
To test your monitor's refresh rate, close out all other tabs in your browser and any background processes, then wait for 30 seconds to 1 minute. The test page will show your display's refresh rate down to several decimal places. Round it to three digits for the next step.

Install and run Rivatuner
Once you have Rivatuner installed, make sure to run it with administrative privileges. Then, click on the green "Add" button at the bottom left. Browse to the install location for your game. (Note, you can set this globally, too, we prefer customizing on a per-game basis).
Select the game executable, then add it to Rivatuner.

Calculate your frame cap
Take your three decimal-place refresh rate, then subtract 0.01 from it. If your refresh rate is 60.001, for instance, your frame cap will be 59.991.
In the Rivatuner interface, select the game on the left hand side. Then, type in your frame rate cap in the box next to frame rate limit. You've now limited your game's frame rate to just under the monitor's refresh rate. You'll want to play around with this number a little bit. Some games are more sensitive to frame capping than others: if you experience lots of judder, trying adding to the frame rate cap by increments of 0.002.
Enable vsync and launch
Launch your game, then make sure to enable vsync in settings. If you're unable to do this, force driver-level vsync from the AMD or Nvidia Control Panel, and that's it!
With low-lag vsync enabled, you'll enjoy substantially better input latency without screen tearing. There are a few caveats you'll need to pay attention to. Low-lag vsync works best if your system is capable of running consistently above the monitor's refresh rate. If you're just hitting the 60 FPS mark, enabling this could cause additional stutter, whenever frame rates dip below.
Scanline sync: An even better alternative
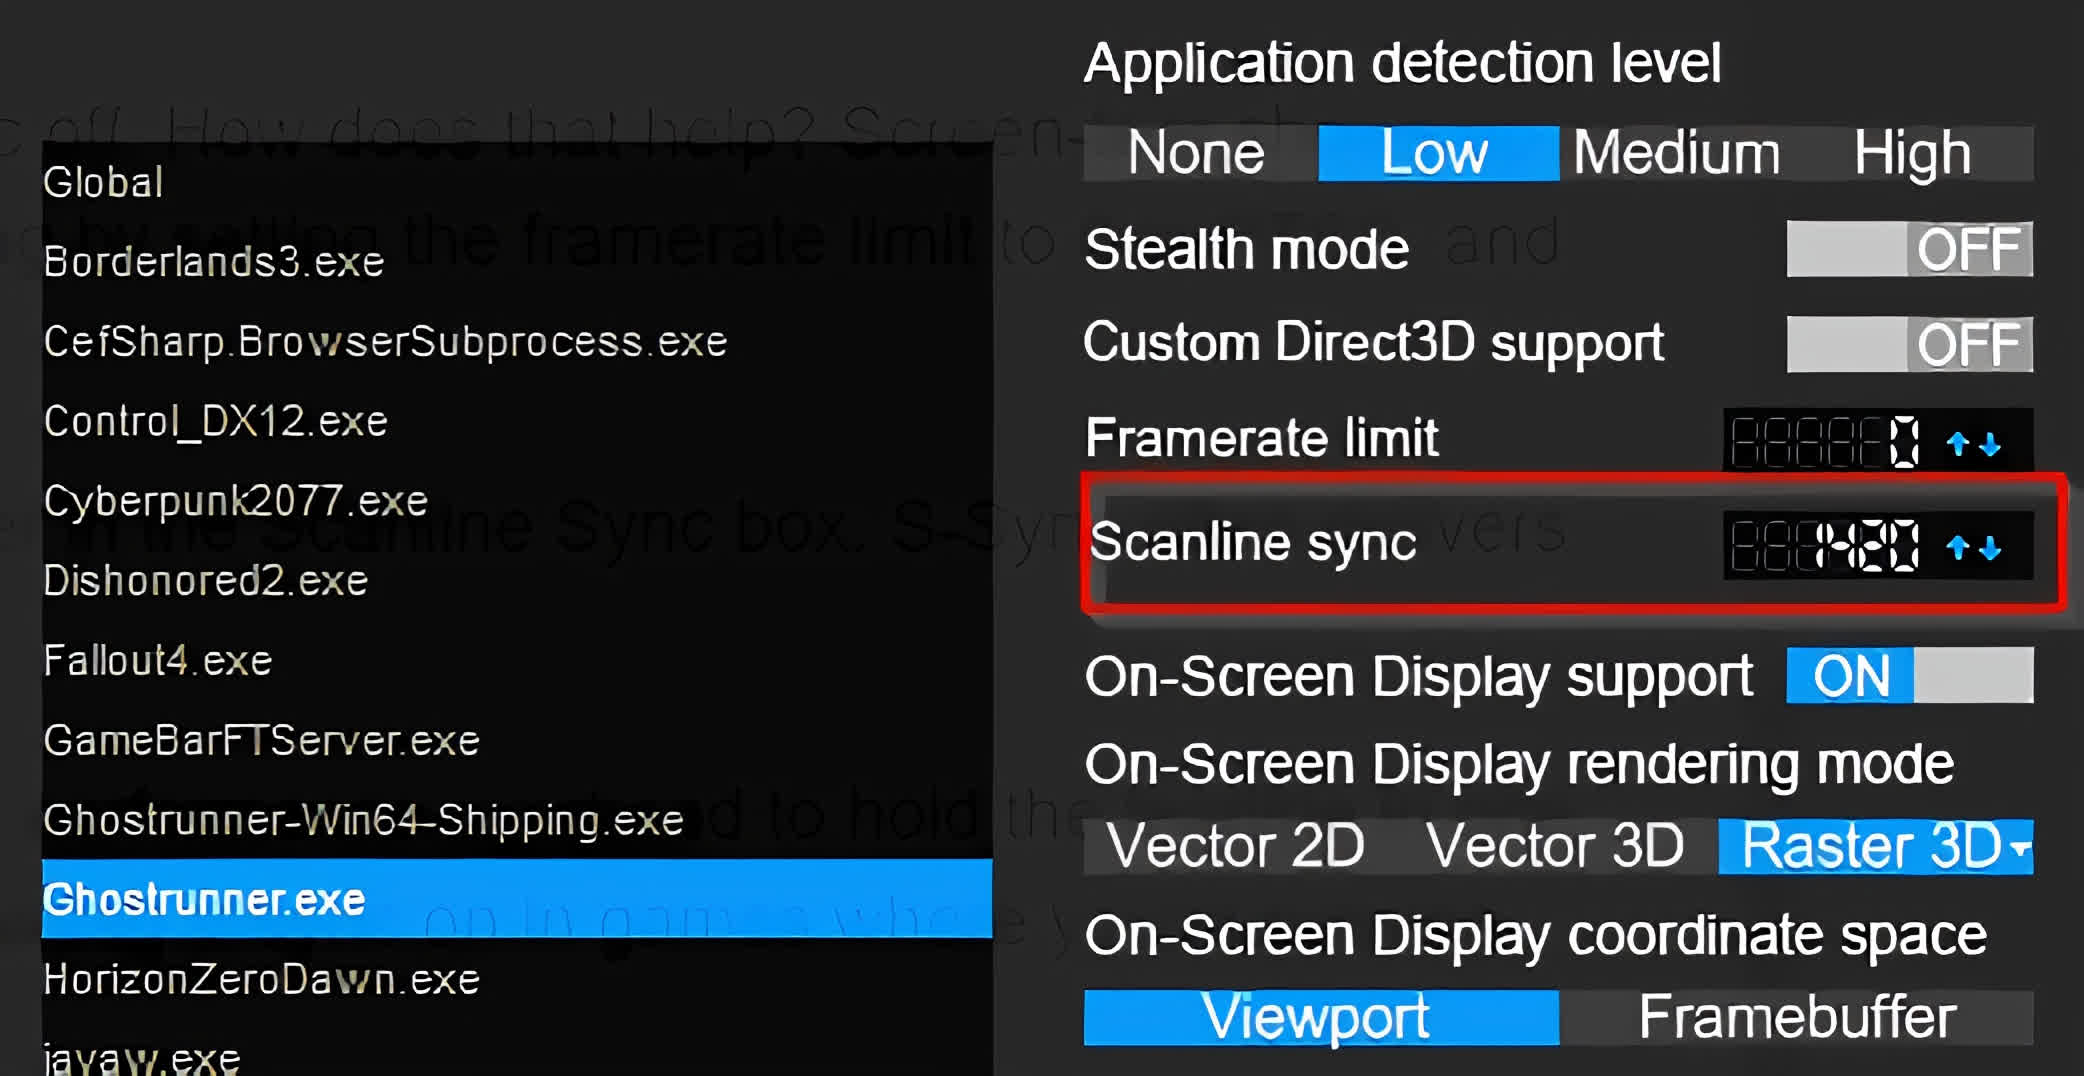
If you don't want to play around with fractional frame rate capping, RTSS offers an alternative: scanline sync. Scanline sync allows you to control where screen-tearing takes place on screen, with vsync off.
How does that help? Screen-tear shows up as a single line that you can then tuck it into the monitor's overscan - at the very top or bottom of the screen, where it effectively disappears. To enable scanline sync, make sure to disable framerate capping by setting the framerate limit to 0 in RTSS, and disable in-game or driver-level vsync.

Then, decide where you want the scanline to be. You'll want to experiment with this, but ideally, take your monitor's vertical resolution (1440 if it's a 1440p monitor), then subtract 10 to 20. Set this number in the Scanline Sync box. S-Sync often delivers even lower input latency than low-latency vsync.
However, note that you will need a powerful system (or a less intensive game) to make the best use of it. In games where your GPU utilization consistently goes above 80 percent, S-Sync doesn't have the performance overhead to hold the tear line in one place and it can cause massive stuttering.
As a rule of thumb, use S-Sync for less intensive games, where your average frame rate can go significantly above 60 FPS. Use low-lag vsync on in games where you're running closer to 60 FPS.
Tweak and go
Certain PC performance tweaks can have a placebo effect or have tradeoffs, as is the case with resolution scaling. But with low-lag vsync, you really are getting a better experience with no tradeoff. If you have the performance headroom to spare but you're not using a gaming monitor with VRR, low-lag vsync on can transform the feel of twitch shooters and competitive games, while getting rid of screen tearing.
There's no special equipment involved and the only software you need is RTSS. If you've followed this guide, you should see a significant improvement in input latency and responsiveness across your game library.
