As part of Microsoft's continuing efforts to close the gap between its console and PCs, the company introduced game streaming, allowing Xbox One owners to play console games on Windows 10 devices that share the same local network.
With game streaming, you're able to enjoy Xbox titles in areas of the home away from where the console is based, which is usually the living room. You could play the games on your bedroom/office desktop, for example, or in the backyard on something like a Surface device – assuming you've got a strong enough network.
Anyone who has a Steam Link will be familiar with the system. It essentially mirrors what's on the Xbox One's screen to your Windows 10 device. The console does all the grunt work; the only specs Microsoft recommends for the device you're streaming to are 2GB of RAM and a 1.5GHz CPU. The most important element is the quality of your home network.
If you want to use the Xbox's streaming option:
- Check that the firmware on the Xbox and the PC device you're streaming to is up to date
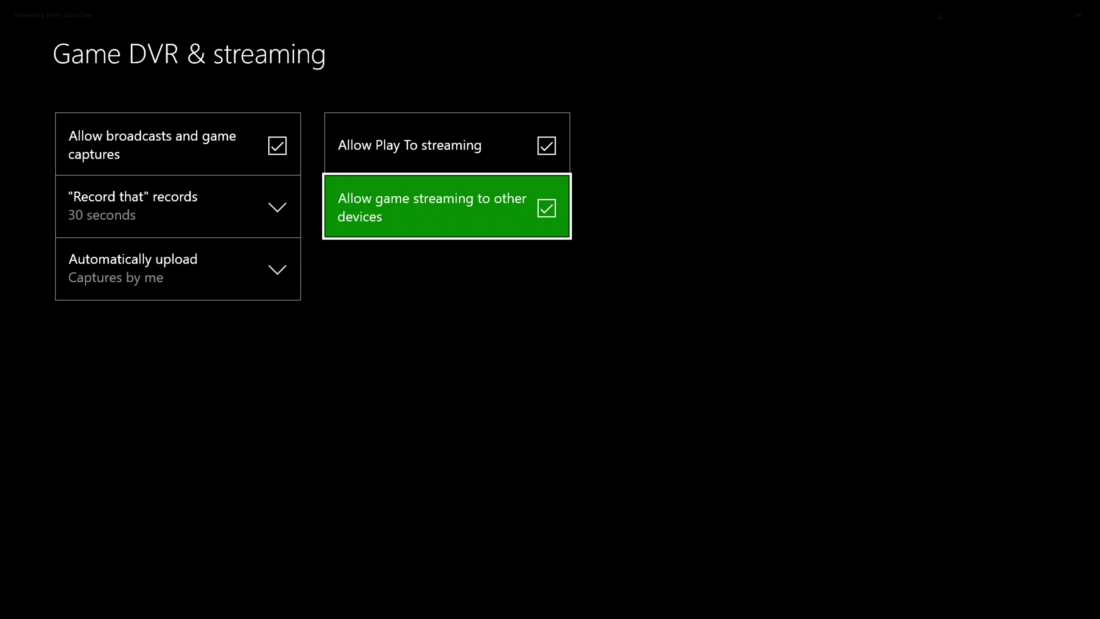
- Navigate to your Xbox's Settings app > Select Preferences.
- Make sure the 'Allow game streaming to other devices' box is checked.

It's now time to open the Xbox app on your Windows 10 streaming device, which you can do by just typing "Xbox" into Cortana and selecting the icon.
- Select Connection from near the bottom of the left-hand side panel.
- Any Xbox One consoles on the home network should appear on the 'Add a device' list. If they don't, you may need to manually enter the IP address, which can be found in the Settings > Network > Advanced Settings section of the console.
- Click on connect.
Assuming you have a controller connected to your PC, you can start playing Xbox One games by selecting "Stream." As with the Steam Link, there are several streaming quality options, which in this instance range from Low to Very High.
Game DVR
Windows 10's Game DVR function is another useful built-in functionality of the Xbox app, allowing users to record and share whatever is on their screen, including Xbox One games when using the streaming method above.
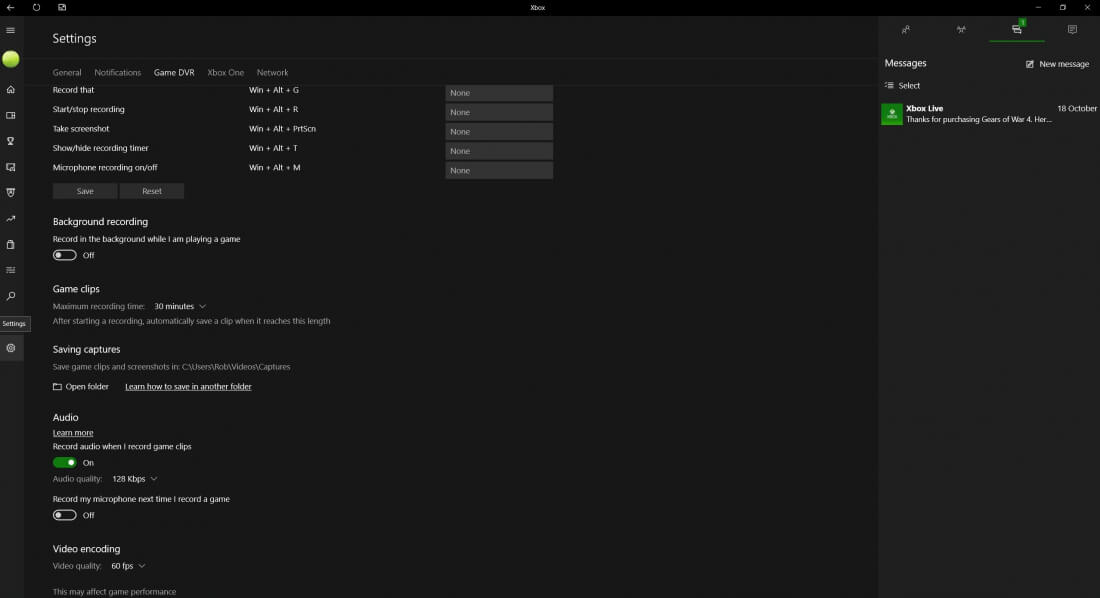
While capture programs such as Nvidia Share (formerly ShadowPlay) and FRAPS remain popular, Game DVR adds to another game recording option to the platform. You can set the system up in your PC's Xbox app by going to the settings option at the bottom of the left sidebar then selecting Game DVR from the list at the top.

It's possible to remap the keys for the DVR functions, which all use the Win keys by default, and there's the all-important toggle for enabling background recording, which, as Microsoft notes when you turn it on, will almost certainly affect game performance. There's also options for audio recording quality, along with ones for video quality and resolution, which again may affect game performance.
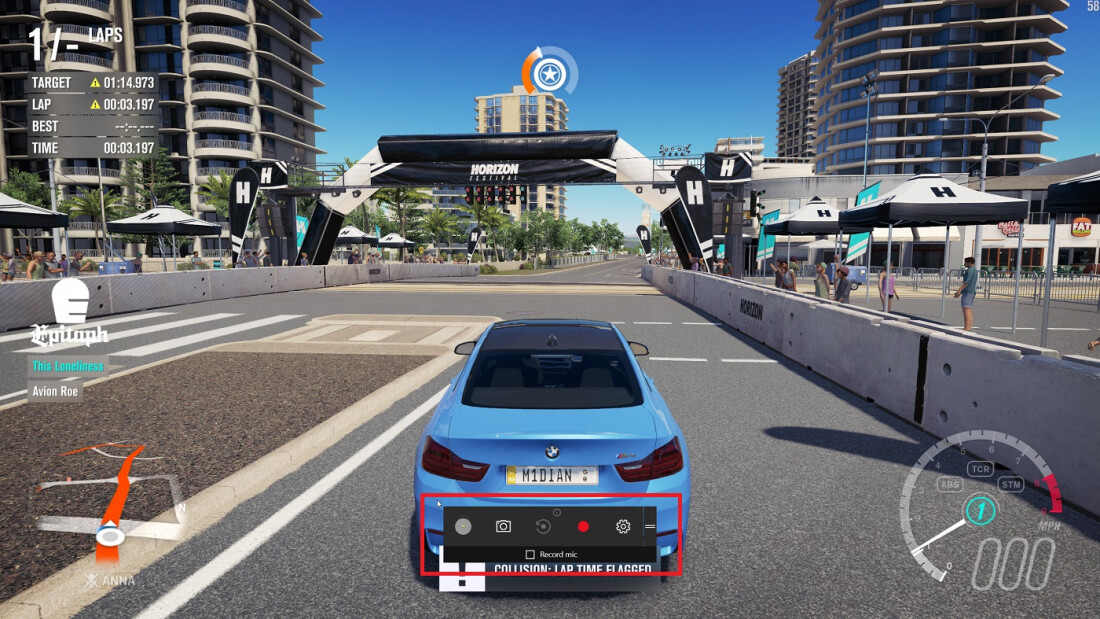
When you want to record something, just hit Win+G to open the game bar. You can use the feature to start and stop recordings and take screenshots (even of other apps not just games), though you can also use the keyboard shortcuts.

You can see all your recorded clips and do some trimming in the Game DVR section of the Xbox App. It's also possible to share them to Xbox Live by hitting upload. You can add anything else using your favorite video editor. Check out an example of a recording made using Game DVR in the video below.
5 days, 5 killer tech tips is a TechSpot monthly feature
On the third week of every month, we'll publish 5 killer tech tips, one for each day of the week for a given app, service, or platform.
This week we are uncovering great Windows 10 usability tips and tricks.
